Affordable Monitor Stands: 7 Best Picks for Remote Setups
Your screen is probably too low. Most remote workers never think about it until their neck starts to complain. The good news is that affordable monitor stands can fix the problem for far less than the cost of a new desk or chair. Whether you work from a kitchen table, a spare bedroom, or a corner of the living room, a simple lift under your display can change how your whole workday feels. This guide covers why screen height matters and how to choose a stand that fits your space. It also walks through seven budget-friendly options, from basic risers to clever do-it-yourself fixes.
Getting Ergonomic Monitor Height Right
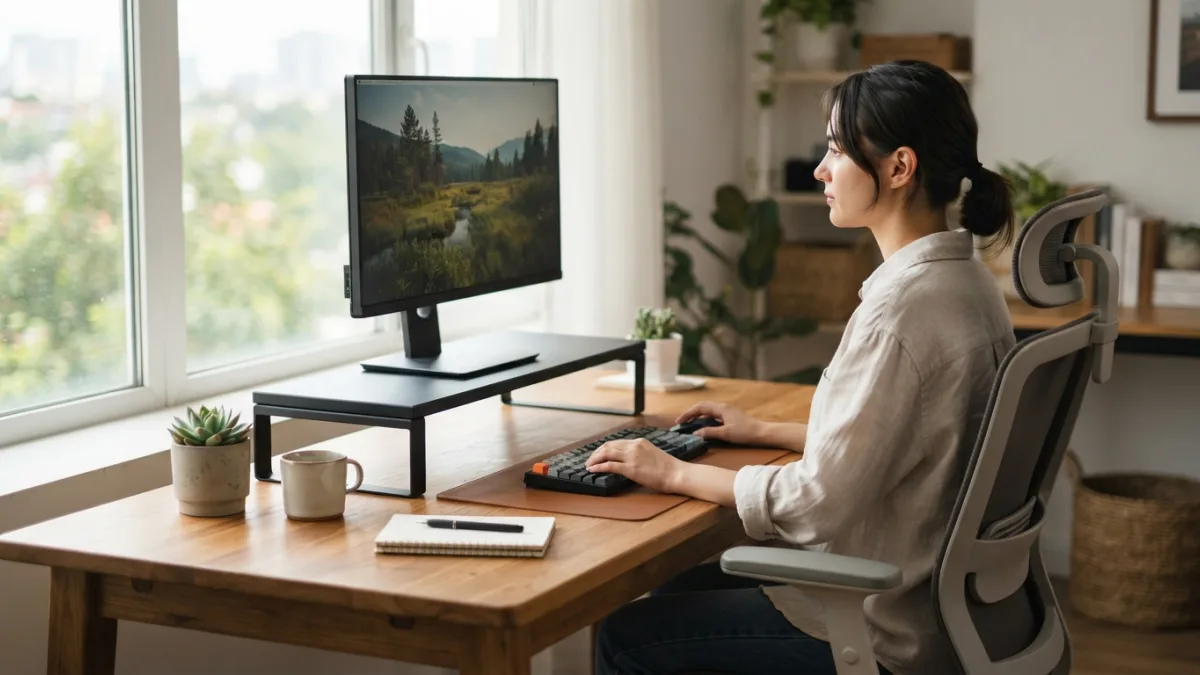
Before you buy anything, it helps to know what you are aiming for. The usual advice is to place the top edge of your screen at or slightly below eye level, about an arm’s length from your face. You should be able to look straight ahead, or just a little down, without tilting your chin. The U.S. Occupational Safety and Health Administration explains this kind of positioning in its computer workstations guidance. Most desks and nearly all laptops fall short of this target. Screens sit too low because manufacturers build monitors with fixed feet, and laptops put the display right next to the keyboard. A stand or riser closes that gap by lifting the screen to where your eyes naturally rest. If you want to dig deeper, our guide on Dual Monitor Setup for Narrow Rooms: 7 Simple Steps covers this in more detail. This is a common part of dealing with affordable monitor stands, and it is worth keeping in mind.
The Hidden Cost of a Low Screen
Neck pain from monitor use often starts quietly. You lean in a little, drop your head a little, and hold that position for hours. By the afternoon, your neck and shoulders feel tight, and you may not connect the ache to your screen at all. Pain has many causes, and a stand is not a medical treatment. Still, ergonomics is built on a simple idea: your workspace should fit your body, not the other way around. Raising your display is one of the easiest changes you can make. If you have ongoing pain, numbness, or headaches, talk to a doctor or physical therapist rather than relying on gear alone. Many people run into this exact issue with affordable monitor stands at some point.
Check Your Home Office Desk Setup First
A stand only works if it fits your desk, your screen, and your body. Spend five minutes on measurements before you shop, and you will avoid returns later. Start with the depth of your desk, because a wide base can push your monitor too close to your face on a shallow table. Then look at the back of your monitor. Many screens have four small holes arranged in a square, which follow the VESA mounting standard. You only need to know this if you plan to use an arm. Finally, think about how you work, whether you use one screen, two, or a laptop. Here is a quick checklist: Keeping affordable monitor stands in mind here will save you time later on.
- Measure your desk depth and the width of your keyboard area.
- Find your monitor’s weight and screen size in the product manual.
- Check for VESA holes on the back of the screen.
- Sit in your normal posture and note where your eyes land.
- Decide if you need extra storage or cable management.
7 Affordable Monitor Stands and Risers to Consider
You do not need to spend a lot to get a better setup. The seven options below cover different desks, budgets, and work styles. Read through them, then pick the one that matches your space rather than the one that looks fanciest. Good affordable monitor stands do one job well: they lift the screen safely and stay out of your way. This detail matters more than it seems once affordable monitor stands comes up again.
1. Simple Fixed-Height Riser
This is the classic starting point: a sturdy platform with short legs, made from plastic, wood, bamboo, or metal. It has no moving parts, so nothing can loosen or wobble over time. Slide your monitor on top, and you gain a few inches of height right away. Fixed risers suit people who share a desk or work in a quiet corner and just want a quick upgrade. The main drawback is that you cannot fine-tune the height. If the riser lifts you too little or too much, you have to swap it. Check the weight limit, and make sure the top surface is wide enough for your monitor’s feet to sit fully on it. This connects closely with another common issue — see Standing Desk vs Regular Desk: Which Is Best in 2026? for more on that. It is one of those small things that makes affordable monitor stands easier to manage overall.
2. Adjustable Laptop Riser
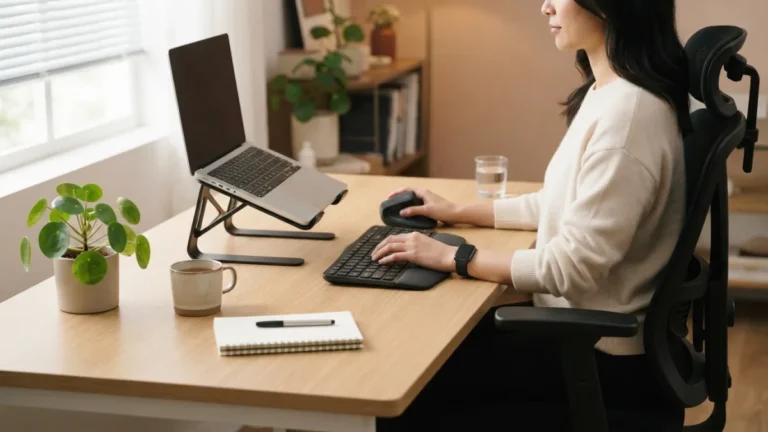
An adjustable laptop riser tilts and lifts your laptop so the screen reaches eye level. Many models fold flat, which makes them easy to toss in a bag if you move between your home and a coworking space. The catch is that a raised laptop puts the keyboard out of reach. You will need a separate keyboard and mouse, so factor those into your budget. Look for rubber grips that keep the laptop from sliding, plus an open design that lets air move around the device. Choose a model with several height settings so you can find the exact position that feels comfortable instead of settling for one preset angle. This is a common part of dealing with affordable monitor stands, and it is worth keeping in mind.
3. Monitor Riser With Storage
A monitor riser with storage turns the dead space under your screen into something useful. Some versions have a small drawer, while others have an open shelf or cubbies. You can keep pens, sticky notes, a notebook, or a phone charger within reach, and your desk looks calmer for it. This option works well in small home offices where every inch counts. Pay attention to total height, though. The extra drawer can lift a large screen higher than you need, which is a problem if you are on the shorter side. Measure first, and confirm the top shelf can handle the weight of your monitor. Many people run into this exact issue with affordable monitor stands at some point.
4. Dual Monitor Desk Stand
A dual monitor desk stand holds two screens on one frame, so you skip buying two separate stands and save desk space. Many designs let you angle each screen inward, which cuts down on neck turning. Put the monitor you use most directly in front of you, and set the second one slightly off to the side. Before you buy, check the maximum screen size and weight for each arm, and confirm that your monitors have compatible mounting holes. Some affordable monitor stands for two screens rely on a clamp, while others use a freestanding base. A freestanding base is easier to set up, but it takes more room on the desk. Keeping affordable monitor stands in mind here will save you time later on.
5. Budget Monitor Arm
The monitor arm vs stand question usually comes down to desk space and flexibility. A stand sits on your desk and is simple to use. An arm clamps to the desk edge, floats the screen in the air, and lets you move it forward, back, up, or down in seconds. That makes it great for fine-tuning your posture or sharing a desk. Budget arms exist, but they need a solid desk edge, so thin or glass tops can be a problem. Your monitor also needs VESA holes. If you want to keep the desktop clear and adjust often, an arm is worth a close look. You might also find our article on Small Home Office: 7 Best Desk Ideas to Save Space helpful here. This detail matters more than it seems once affordable monitor stands comes up again.
6. DIY Monitor Stand Ideas
If money is tight, some of the best DIY monitor stand ideas use things you already own. A stack of sturdy hardcover books can work in a pinch, as can a solid wooden crate or a short shelf board set across two equal blocks. The rule is stability. Your setup should not slide, tip, or sag under the weight of a screen, and it should be wide enough to support the monitor’s feet. Avoid cardboard boxes and tall, uneven stacks. A DIY stand will not look as polished as a store-bought one, but it can bridge the gap until you are ready to buy something better. Test it carefully before you trust it. It is one of those small things that makes affordable monitor stands easier to manage overall.
7. Desk Shelf or Bridge-Style Stand
A desk shelf stand spans over your keyboard like a small bridge. Your monitor sits on top, and you can slide the keyboard underneath when you are not typing. That frees up surface area, which helps on compact desks. It also gives you a handy shelf for a notepad or a plant. These stands work best when the legs are wide enough to clear your keyboard and mouse comfortably. Look for a flat, even top and non-slip feet so nothing shifts as you type. Among affordable monitor stands, this style offers a good balance of height, space, and tidiness for people with small workspaces. This is a common part of dealing with affordable monitor stands, and it is worth keeping in mind.
Quick Comparison
| Option | Best for | Watch out for |
|---|---|---|
| Fixed-height riser | Simple, quick upgrade | No height adjustment |
| Adjustable laptop riser | Laptop users and travelers | Needs separate keyboard and mouse |
| Riser with storage | Small, cluttered desks | May raise the screen too high |
| Dual monitor stand | Two-screen workflows | Weight limits and base size |
| Budget monitor arm | Flexible positioning | Needs VESA holes and a strong desk edge |
| DIY stand | Tight budgets, temporary use | Stability and safety |
| Desk shelf stand | Compact desks | Leg width and keyboard clearance |
Choosing the Right Pick for Your Space
There is no single best answer, only the best fit for your desk and habits. If you use a laptop all day, start with an adjustable laptop riser and a separate keyboard. If you run two screens, a dual stand will tidy things up. If your desk is crowded, look at a shelf stand or a riser with storage. Whichever you choose, set the height so your eyes meet the top third of the screen, then sit back and see how your neck feels after a few days. Small tweaks often matter more than the price tag. Affordable monitor stands make that process easy, because you can adjust or replace them without a big investment. Many people run into this exact issue with affordable monitor stands at some point.
Frequently Asked Questions
How high should my monitor be?
Aim for the top edge of the screen to sit at or slightly below eye level. Keep the display about an arm’s length away, and make small changes until you can look ahead without tilting your head up or down. For a related walkthrough, check out Best Budget Desk Setups for Remote Workers. Keeping affordable monitor stands in mind here will save you time later on.
Are cheap monitor stands safe for large screens?
They can be, but only if you stay within the stated weight and size limits. Check the product manual for your monitor’s weight, then compare it with the stand’s maximum load. When in doubt, choose a sturdier model. This detail matters more than it seems once affordable monitor stands comes up again.
Do I need a monitor stand if I use a laptop?
If you work on a laptop for long stretches, yes, it helps. A riser lifts the screen to a more comfortable height, but you will need an external keyboard and mouse so your arms and wrists stay in a good position. It is one of those small things that makes affordable monitor stands easier to manage overall.
Is a monitor arm better than a stand?
Not always. Arms offer more flexibility and free up desk space, but they need a strong desk edge and VESA mounting holes. Stands are simpler, often cheaper, and work with almost any monitor. This is a common part of dealing with affordable monitor stands, and it is worth keeping in mind.
Can affordable monitor stands really reduce discomfort?
They can help by improving your posture, especially if your screen was too low before. They are not a cure for pain, though. If discomfort continues, speak with a healthcare professional. Many people run into this exact issue with affordable monitor stands at some point.

Ghani Mejber — Founder & Lead Editor
Ghani Mejber is the founder and lead editor of Remote Work Routine. Having navigated the transition to full-time remote work firsthand, Ghani tests home office ergonomics, time-blocking workflows, and productivity software to help remote professionals structure their days and avoid burnout.